Twinkling LEDs Jewelry Display
This project is still a work in progress, but here is what I have done so far.
Like many girls I have outgrown the quantity of jewelry I own versus their storage space. I also disliked smelling "enclosed metal" every time I opened the little drawers in my jewelry box. The space I have for my jewelry is the upper division of a double door armoire. To avoid drilling holes into the furniture, I decided to use wooden panels covered in black fabric. Inserting screw hooks along the top would allow me to hang all my necklaces for a tangle-free and easy-to-view display. This layout would leave the rest of the space available to display my earrings, bracelets and rings.


I purchased a black and white semicircular display for my rings, as well as two body jewelry displays. If you want to give your displays a more personal touch, there are DIY tutorials online on how to make your own. I almost bought a $25 three-tier bracelet holder from eBay, but decided to make my own using leftover wood from the backsplash and a piece of PVC.


I cut the PVC into 6, 8, and 10 inch pieces at Home Depot, using one of their PVC cutters. They could have all measured the same, but I just wanted to add character. I drew the design for the base and cut it out using a Dremel. I had to ensure the holes in the wood for the PVC were going to be big enough after being covered in fabric. The plywood I was using was too narrow to build a proper support to hold the structure upright. I helped my fiancé Bill Porter design corners for the base using our MakerBot 3-D printer. Using a hot glue gun, I covered each piece for the base with white fabric, and then attached them with a stapling gun. Each piece of PVC was simply slid tightly through each hole.


Instead of PVC, optional materials could be the inner tube of a toilet paper roll, or a paper towel roll, these could be strengthened by filling them up with crumbled paper or other materials. I preferred PVC since it offered more sturdiness. I also preferred the T-stand approach since it allowed me to take the bracelets in and out more freely from either side.
To hang long earrings, I attached mesh fabric to two picture mats. I fastened strips of decorative ribbon to the third mat to hang my studs. Other tutorials I saw used an actual picture frame with the glass removed, and with anything from an unwound bath sponge to lace.


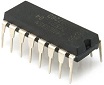
My about-to-be-amazing jewelry display needed some light inside the dark armoire, thus the idea of creating a starry night effect. I already knew there were different methods of controlling multiple LEDs such as multiplexing and Charlieplexing. I started researching to find out how useful each was in practice, then came upon an example explaining how to control multiple LEDs with a 74HC595 shift register. I researched this chip which had an output current of 35mA per output pin, but only 70mA for the entire package. This restricted me to only 3 of my 30mA LEDs per shift register. And of course, it wasn't until now that I paid attention to the type of LED I had bought. They were a little too bright.

I then found that a TPIC6595 shift register for $1.43 each, would allow me to use 8 LEDs per register. Each output pin had an output current of 250mA, thus allowing me to connect 8 LEDs in series to control a total of 128 LEDs per register. The downfall was that this chip was surface mount with the pins way too close together for a newbie like me. Plus each series of LEDs would need a resistor to control the current passing through.
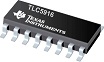
And then I found the TLC5916 in a forum, which was still a surface mount chip, but with more spaced out pins. The 5916 only had 8 output pins, but with 120mA per pin, it allowed me to control 24 LEDs per shift register. The chip featured an internal constant current source, thus removing the need for a resistor in every string of LEDs. I designed a small PCB to break out the TLC5916 chip and distribute power to the LEDs.
I considered powering my design using batteries, but this meant having to replace or recharge them too often. I had estimated that the total power dissipated per chip was going to be 144mW and draw a current of 2.4mA or a total of 2.3W and 3.8A for the entire system. As a more permanent solution, I decided to power the design by plugging it in to a wall outlet. I'm still researching the type of power supply to use.
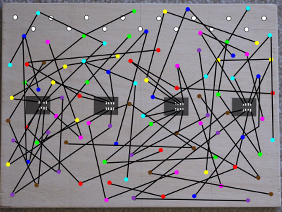
I laid out patterns on the wood panels for the screw hooks, the LEDs, and the PCBs. I then drilled the corresponding holes, making different sizes for the LEDs to create the illusion of close and far-away stars. I fastened the LEDs to the wood using a hot glue gun, ensuring they were all facing the same way. I bent all the positives to the right, and all the negatives straight down. This helped me keep track of the orientation for the anodes and cathodes for wiring them later.


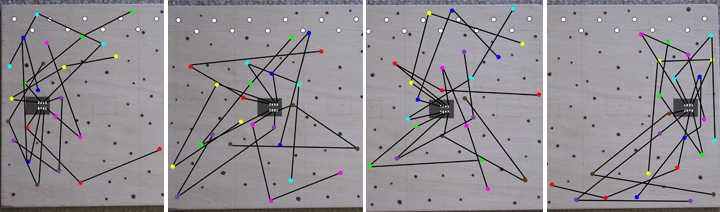
I mapped a random pattern to connect the LEDs in PhotoShop (I could have easily used paint, but I like being able to work in layers). The drawings provided me with a controlled guidance to properly wire the LEDs when faced with the future mess of wires. I connected three random LEDs in series per output pin to enhance the random dimming and twinkling effect.
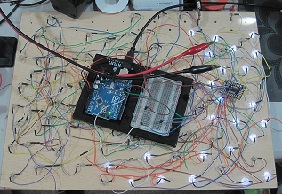
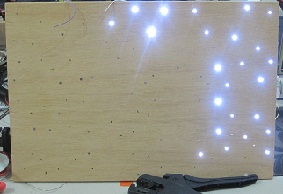
After soldering all the LEDs on one of the panels, I decided to test it to ensure the connections were correct. I connected one of the sections within the panel at a time in order to observe any deficiencies faster and more easily. I loaded a sample code to the Arduino and observed the LEDs dim and brighten beautifully.
The next steps are to populate and solder all the wires to the PCBs, and place each of them in the middle of their sections with double sided tape. I plan on adding an extra layer of fabric in front of some LEDs to diffuse the light emitting from the bright white LEDs. The wood panels will be entirely covered using black fabric with the white hooks screwed in place. I'm thinking about installing a micro-switch against one of the double doors. This way the LEDs would come on and shut off automatically when I open and close the door.